Puppy Dental Care: Teeth, Teething and Tooth Care

Just like human babies, ​puppies have baby teeth that fall out. Most puppies are born without teeth and go through a process known as puppy teething. From birth to six months, sharp puppy teeth erupt from the gums in the jaw in a predictable timeline. Puppies go through teething stages during the development of their teeth, including sore gums, and eventually—the eruption of 28 baby teeth. During teething, puppies may target all kinds of unexpected objects to gnaw and chew on, like baseboards and shoes, to relieve the discomfort. However, most dogs never outgrow the urge to chew. Pet owners are encouraged to learn about how their puppy's teeth grow in so they can best handle their dog as it ages.

Stages of Puppy Teeth and Teething

Birth to 2 Weeks

When your puppy is born, there are no teeth yet. During the first two weeks, you'll notice your puppy nursing and first opening its eyes.


Weeks 2 to 4

In the front of the mouth, narrow-edged teeth known as incisors will begin to emerge. The incisors are the first to appear at about two to three weeks of age. Puppies have six incisors on both the top and bottom jaw.

Premolars and molars also begin to grow behind canines (the pointed teeth between the incisors and premolars) at three to six weeks of age, with three on the top and bottom of each side. Four needle-like canines appear at age four weeks and frame the incisors, one on each side, top, and bottom.

Weeks 5 to 8

The last molars appear by six to eight weeks of age. At about eight weeks, the puppy’s permanent teeth begin pushing out deciduous or "milk teeth." The roots of the baby teeth are absorbed by the body, and in most cases, milk teeth simply fall out.

When the deciduous teeth don't fall out on time, puppies may appear to have a double set of teeth. Retained baby teeth should be extracted by a veterinarian so that permanent teeth have room to grow. Sometimes, a crowded mouth pushes teeth out of alignment, resulting in difficulty eating or poor dental hygiene (which can lead to periodontal disease).

All of your puppy's 28 baby teeth are expected to come in by this time. This is when puppies start to learn how to eat moist and soft puppy food.

Weeks 12 to 16

Breeders often let their puppies go to their new owners' homes around eight weeks. Baby teeth will begin to shed, and permanent adult teeth will start to come in. This process is painful for dogs, so providing puppy safe chew toys is recommended. This is a good time to socialize your dog more, look and touch the inside and outside of its mouth, and prepare for teeth brushing.

6 Months and Older

At this point, all puppy teeth should be gone, and adult teeth emerge. If there are any baby teeth left, let your vet know so it can be removed. Permanent teeth replace the milk teeth tooth-for-tooth and add four premolars and 10 molars. Most pups will have 42 permanent teeth in place by about seven months of age.

Signs to Keep an Eye on During Teething

While it can vary somewhat between breeds, there is a progression you can expect as your puppy develops new teeth. It's important to begin handling your puppy's mouth while it's young so you can periodically check for any potential tooth problems. Any type of facial swelling, changes in eating habits, unexpected night awakenings, or rubbing of the face are signs of possible oral discomfort.

You'll want to take your pup to the veterinarian if you see:

  • Two teeth occupying one spot in your puppy's mouth. This can cause the adult tooth to come in crooked, possibly causing later problems.

  • Spots of blood on your dog's toys, brown tartar on the teeth, or gums that are bleeding, inflamed, and/or sore. These are common symptoms of periodontal disease, a large oral issue for dogs.

  • Broken or cracked teeth. This can cause the nerve of the tooth to expose itself, causing your dog pain or infection.

  • Crooked teeth or malocclusion (misalignment of the upper and lower jaw). While some breeds have a trademark bite, unusual ones could cause chewing issues.

  • Loose adult teeth. Most often, this is caused by trauma to the mouth or from gum loss due to advanced periodontal disease. It could also be a sign of illness.

How to Keep Teeth Healthy

Schedule a visit with your veterinarian for an initial dental exam for your puppy. This examination will include a look at the teeth, gums, and oral cavity. Ask your vet to demonstrate how to clean your pup's teeth. This way, you'll know what brushes, toothpaste, and techniques to use.

Get your pup used to the idea of tooth brushing around six months when its adult teeth start to come in. Regular brushing will prevent plaque, stinky breath, disease, and other medical problems. It's ideal to brush your puppy's teeth daily, but once or twice a week will work.

The Purpose of Each Dog Tooth

Different kinds of teeth serve various functions, based on the position of the mouth and the shape of the tooth. With some breeds, the shape of the jaw impacts how each type of tooth functions. Most dogs have V-shaped upper and lower jaws which allow the mouth to be opened very wide for grasping and capturing prey—or grabbing and holding toys during play. There are several ways dogs use their teeth:

  • Dogs use their incisors to rip and scrape meat from bones. They also use them as a grooming tool to nibble burrs or dirt from their fur.

  • Dogs use their two canine teeth, found on each side of the jaw (on the top and bottom), as pointed daggers to inflict stabbing and slashing wounds.

  • Dogs have eight premolars in the upper jaw and another eight in the lower jaw. They also have four molars in the top and six in the bottom. The extra molars are designed to crush and are used to process vegetable foods and bones.

  • Dogs have specialized carnassial teeth composed of premolars and molars. As they pass each other during the mouth's closure, these teeth act like scissors. The carnassial teeth are innovations of the carnivorous animal that requires shearing action to process flesh.

What a Proper Bite Looks Like

When the mouth is closed, dogs should have a normal "bite." This is very important so that dogs can eat and use their mouth normally.

A normal bite looks like this:

  • The lower canine teeth are situated in front of the upper canines.

  • The upper incisors overlap the lower incisors.

  • The upper premolar points fit into the spaces between lower premolars.

  • The upper carnassial teeth overlap the lower ones.

Malocclusion refers to the abnormal "bite" or fitting of these teeth. Malocclusion can be normal for certain dog breeds due to differences in the shape of the jaw and mouth. For instance, the flat-faced (brachycephalic) dog breeds like Bulldogs have a normal malocclusion because their lower jaw is longer than the upper. However, this allows the teeth to fit incorrectly, which can cause mouth damage as the dog chews. Thus, a veterinarian or veterinary dentist with orthodontic correction should be aware of malocclusion.


Hear From Us Again

Don't forget to subscribe to our email newsletter for more recipes, articles, and clinic updates delivered straight to your e-mail inbox.

Related Categories:

dog health

Discolored Teeth in Dogs

Stained Tooth and Teeth in Dogs

Teeth discoloration is any variation from normal tooth color. However, the normal color of teeth varies, dependent on the shade, thickness, and translucency of the enamel covering the tooth.

Any variation from normal tooth color is discoloration. The normal color of teeth varies, dependent on the shade, thickness and translucency of the enamel covering the tooth. Extrinsic discoloration occurs when exogenous pigment accumulates on the surface of teeth. That is, the cause of the discoloration is from an external source, rather than from a physical condition. Intrinsic discoloration is characterized by secondary factors that are happening inside the tooth, discoloring the underlying dentin.

Symptoms and Types

Intrinsic discoloration is characterized by secondary factors that are happening inside the tooth, discoloring the underlying dentin. Extrinsic discoloration, meanwhile, occurs when exogenous pigment accumulates on the surface of teeth. That is, the cause of the discoloration is from an external source, rather than from a physical condition.

Common symptoms associated with both discoloration types include:

  • Abnormal coloration of one or more teeth

  • Fractured tooth

  • Pitted enamel (the glossy covering of the tooth) with staining

  • Rings or lines of discoloration around one or more teeth

Causes

Extrinsic discoloration

  • Bacterial stains from plaque (mucin, debris, bacteria and a thin film of food) and calculus

  • Foods

  • Bleeding gums

  • Dental restorative materials

  • Medications

  • Metal

Intrinsic discoloration

  • Internal (trauma, injury)

  • Localized red blood cell destruction in the tooth (trauma)

  • Systemic infections

  • Medications (tetracycline)

  • Exposure to too much fluorine (ingestion of toothpaste containing fluoride)

  • High levels of bilirubin in the blood (from bile, the liquid in the gallbladder that helps to dissolve food in the intestines)

  • Amelogenesis imperfecta (a condition in which dental enamel does not calcify enough)

  • Dentinogenesis imperfecta. (a condition in which the dentin does not develop correctly)

Diagnosis

A complete blood profile is to be conducted, including a chemical blood profile, a complete blood count, and a urinalysis. You will need to give a thorough history of your dog's health, onset of symptoms, and possible conditions that might have caused this condition, such as diet, injury, recent illnesses, etc. The history you provide may give your veterinarian clues to the origin of the dental condition.

An oral exam is part of a thorough physical exam. Your veterinarian will need to x-ray your dog's teeth in order to identify internal or external resorption, and whether restorative materials or bacterial stain from bacteria are entering the crown of the teeth. Your veterinarian may also use a strong fiber optic light that is focused on the teeth to determine vital from dead dental pulp (the nerves and blood vessels in the tooth). If the tooth (or teeth) need to be removed, your veterinarian will most likely need to subdue your dog with general anesthetize in order to extract it.

Treatment

Extrinsic stain removal can be performed for cosmetic reasons. These procedures often involve internal and/or external treatments such as bleaching, veneers and crowns.

Intrinsic stain removal may be done to improve the function of the teeth and to relieve pain for your dog. This often involves using endodontic treatment (endodontics treat the interior of the tooth, pulp and surrounding tissue of the teeth). Crowns and veneers may be used to protect the teeth and the pulp in the teeth.

Living and Management

Any discolored teeth should be treated to prevent plaque and calculus buildup and to prevent further periodontal disease. Discolored teeth are more prone to fracture, which could result in tooth abscessation (formation of an abscess, usually in response to bacterial infection).

Discoloration may be prevented in future litters by avoiding giving certain medications to the pregnant pup. With proper attention, discoloration of teeth can be prevented in puppies.


Hear From Us Again

Don't forget to subscribe to our email newsletter for more recipes, articles, and clinic updates delivered straight to your e-mail inbox.

Related Categories:

dog health

How to Train Your Pet to Love Grooming and Nail Trims

You finally mustered the nerve to carry out the task you’ve been dreading all week—a must because you’re having guests and you want your pet to look their best! Brush in one hand, nail clippers in the other, you begin your hunt throughout the house. “Over here!” shouts your spouse. The two of you conspire to hold the struggling pup down to give a toenail trim and groom their mats out but after just seconds you both give up.

Many pet parents are afraid or unable to trim their dog or cat’s nails and some are even unable to brush their pets. You might think it’s not a big deal; however, these are essential pet care tasks that may need to be performed on a regular basis. Untrimmed or worn nails can snag on objects and tear as well as cause abnormal walking gait. They can even grow so long that they curve around back into the foot causing lameness and pain. Long nails can also cause damage to furniture and can scratch humans who are playing with their long-nailed pets. Brushing is also essential in pets with long-hair or thick coats in order to prevent matting, help decrease shedding, and prevent associated skin problems.

Getting Started

In order to teach your dog to accept grooming, you are going to need a few basic supplies. You should have a toothbrush and toothpaste specially designed for dogs, which are generally available at your vet or local pet store. A brush and dog nail clipper or Dremel will also be vital for training as well as essential grooming tools you should keep at home for in between-groomer-visits doggy maintenance. Finally, a selection of treats will come in handy for teaching your dog to associate pawsitive and happy experiences with grooming.

Training pets to be ok with being brushed

Step 1- Introduce the brush

Brushing is a vital part of your dog’s health. Brushing your dog’s coat stimulates growth, eliminates loose fur, and distributes natural oils to help with overall coat health and appearance. To begin teaching your dog to like being brushed, first let them inspect the comb, brush or other grooming tool. Be sure to treat and praise your dog for sniffing and ignoring or otherwise being indifferent to the presence of the brush.

Step 2- Touch with the brush

Once your dog is used to the brush, touch them gently on their body with the brush. Remember to treat and praise after for good associations with the grooming tool.

Step 3- Brush your dog

Once your dog is used to being touched with the brush, start performing gentle stroking motions over their coat. Keep the grooming sessions short, as you are still in the acclimation phase and aren’t actually looking to clean or style your pup at this time. Give plenty of treats to your dog while brushing.

Step 4- Add in other tools

Once your dog has learned to accept being brushed, it’s time to work in other tools. Shower heads, blow dryers, combs and clippers are all common items used by groomers. Acclimate your dog to one item at a time using steps 1-4 above and your pooch will learn to love grooming in no time.

Training pets to be ok with having their nails trimmed

Step 1- Handling the feet

Dogs naturally have an aversion to having their paws handled. You’ll need to slowly acclimate your dog to having their paws, pads, and nails touched in order to teach them to allow their nails to be clipped. Start out with a selection of treats nearby and with your dog in a relaxed position, preferably lying down. Spend some time briefly touching and lightly squeezing the paws, always followed by a treat.

Step 2- Touching and squeezing the nails

After your dog is used to having their paws handled generally, move to the more sensitive nails. Start by touching the nail for just a moment and then praising and treating your dog. Slowly work up to squeezing your dog’s nail gently to imitate the pressure applied by clippers or a file.

Step 3- Introducing tools

Once your dog is used to your hands touching their nails, you will need to introduce your cutting apparatus. Depending on the size of your dog, you may choose to use a file, clippers or an electronic Dremel. Touch your nail trimmer to your dog’s nail briefly and then treat and praise. Repeat until your dog is not concerned with the trimmer being near or touching them.

Step 4- Begin filing and clipping

Start off filing or clipping briefly, one nail at a time instead of the entire foot. After the first trim, praise and treat your dog. If Fido becomes agitated, you may need to repeat earlier steps, getting your dog used to the trimmer touching their nail.

Step 5- Practice and repeat

Slowly work your way up to two, three and then all the nails. Be sure to work evenly on your dog’s front and back feet, both for practice and in trimming. Nail trimming is an important grooming chore on your dog and an essential behavior for training your dog to allow grooming.

Training pets to be ok with having their teeth brushed

Step 1- The touch

Teaching your dog to accept inspection, brushing and other manipulation of the mouth is vital for good oral hygiene. Start out in a familiar and neutral area of the house. Wait until your dog is calm and relaxed and then touch their muzzle gently and briefly. Immediately treat and praise.

Step 2- Lift the lip

After your dog has become used to you touching their muzzle, progress to lifting a lip briefly. After you’ve released the lip, quickly treat and praise to create a strong association with food items and your manipulation of their mouth.

Step 3- Increase duration

Once your dog is accepting regular lifting of the lip, increase the amount of time you touch and hold onto their lip. Hold their lip up and inspect their teeth. When you release, immediately treat and praise.

Step 4- Add the brush

Repeat steps 1-3, adding in a tooth brush instead of your hand or finger. Your dog may be curious about the brush at first. It will be important to only treat and praise when they ignore the implement instead of trying to chew or lick it.

Step 5- Let's get brushing

After your dog is acclimated to the feel of the brush, it’s time to clean their teeth. Start by touching the brush to the teeth and then work your way up to a gentle scrubbing motion. Before you know it, your pooch will be ready to show off those pearly whites to the professionals.


Hear From Us Again

Don't forget to subscribe to our email newsletter for more recipes, articles, and clinic updates delivered straight to your e-mail inbox.

Related Categories:

dog health

7 Ways to Make the Holidays Safer for Pets: Holiday Pet Safety Crash Course

​Nothing can spoil holiday cheer like an emergency visit to a veterinary clinic. These seven tips can help prevent a holiday disaster with your pets.

7 Ways to Make The Holidays Safer for Pets

  1. Keep people food out of the reach of your pet, and ask your guests to do the same.

  2. Make sure your pet doesn't have any access to treats, especially those containing chocolate, xylitol, grapes/raisins, onions or other toxic foods.

  3. Don't leave your pet alone in the room with lit candles, a decorated tree or potpourri.

  4. Keep holiday plants (especially holly, mistletoe and lillies) out of reach of pets.

  5. Consider leaving the tinsel off your tree if you have a cat.

  6. Secure your Christmas tree to keep it from falling over if your dog bumps it or your cat climbs it. Hanging lemon-scented car air fresheners in the tree may deter your cat from climbing it.

  7. Provide a safe place for your pet to escape the excitement (such as a kennel, crate, perching place, scratching post shelf or hiding place) if you’re entertaining guests. If your pet is excitable or scared, consider putting your pet in another room with some toys and a comfortable bed.

Plan in advance

Make sure you know how to get to your 24/7 emergency veterinary clinic before there's an emergency. Talk with your veterinarian in advance to find out where you would need to take your pet, and plan your travel route so you're not trying to find your way when stressed. Always keep these numbers posted in an easy-to-find location in case of emergencies:

  • Your veterinarian's clinic phone number

  • 24/7 emergency veterinary clinic

  • ASPCA Poison Control Hotline: 1-888-426-4435 (A fee may apply.)

If you’re a client of ours at River Landings Animal Clinic, additional numbers to make note of are:

  • Animal ER - (941) 355-2884

  • Vet Care Express Animal Ambulance - (941) 592-5131

  • 24/7 Pet Poison Control Center - (855) 764-7661


Hear From Us Again

Don't forget to subscribe to our email newsletter for more recipes, articles, and clinic updates delivered straight to your e-mail inbox.

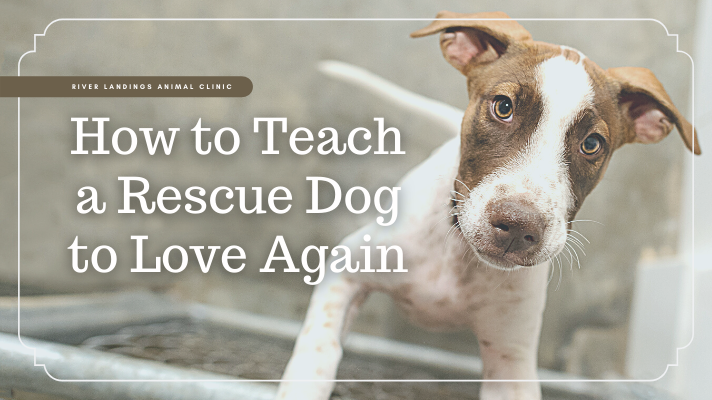
How to Teach a Rescue Dog to Love Again

Imagine you’re a dog that has been surrendered, and upon waking up, only to find that everything in your world is different. Around you, others are screaming and crying. Now imagine you’re a stray, found on the streets never knowing where your next meal may be or maybe you spent most of your days chained up and unloved. On good days, a stranger comes to visit and take you for a walk. The rest of the time, there is nothing to do but sleep and wait. Then, it all changes again. A new family. A new home. All new smells. It’s no wonder that bonding with rescue dogs is a slow, tedious process that requires patience.

The First Steps to Bonding With a Rescue Dog

Dogs are trusting by nature but that trust has limits. The more a dog is subject to abandonment, the more anxiety-ridden they’re likely to be. While we may not always know the specific circumstances that led a dog to feel unsafe in the world, rebuilding trust is possible.

Give your new dog space

One of the larger mistakes people make with fearful dogs is paying them too much attention too quickly. For most dogs with severe anxiety or trust issues, you are part of the landscape of scary stuff they’ve been thrust into.

The absolute best thing you can do for an emotionally fragile dog is to give them space. Bonding with a rescue dog is all about going slow. Don’t force your dog to sit with you on the couch or sleep with you in the bed. Do offer them a comfortable alternative (like a dog bed) that is theirs alone, somewhere within eyesight but just out of reach.

Let your dog guide your interactions

Instead of approaching your dog to give them attention, let your dog come to you when they’re feeling comfortable.

A few other tips for bonding with a rescue dog at a pace they can handle:

  • Stay away from petting sensitive areas like their head, ears, tail, and paws.

  • Choose to pet areas like your dog’s side or back.

  • Never hover, bend over your dog or attempt to hug them close to your body. These actions can make a frightened dog feel trapped and lead to increased anxiety and even a bite.

  • Never allow someone unfamiliar to approach and pet your dog unless your dog is soliciting attention from them.

Try classical conditioning

If your pet is skittish when you move around, classical conditioning and desensitization techniques can help your pet feel more secure about being in your presence. Your objective is to merely deliver an amazing, delicious treat.

Here’s how to do it:

  1. With a chunk of high-value food (chicken, cheese, hot dogs, etc.) or a yummy chew like a pig’s ear or bully stick, walk towards your dog.

  2. Drop the object close by, then continue walking away.

  3. You can speak to your dog in pleasing, soothing tones, but don’t stop to pet them.

  4. Repeat this daily (or multiple times a day) until you see your dog start to perk up a bit when you approach.

  5. Next time you drop the food, instead of walking away, hang out nearby.

  6. You can talk to your dog in soothing tones but don’t interfere with your dog’s eating. (NEVER take away a food object from a fearful dog.)

  7. Repeat until your dog is able to comfortably eat their treat with you nearby.

Over time, and with repetition, your dog learns that being near you is a positive experience, and they’ll start to relax. A calm dog is more open to bonding with you.

Avoid hand-delivered treats in the beginning

Sure, bonding with a rescue dog involves treats—but it’s unwise to make a fearful dog take food from your hand. Some dogs may be willing to get closer than they’re comfortable with in order to get high-value food, but by pushing them beyond their stress threshold, they’re unlikely to make long-term improvements.

Here’s how to work your way toward hand-fed treats:

  • Instead of giving your dog a treat from your hand, toss it a few feet away from you.

  • Repeat regularly until your dog is comfortable within a few feet of you and is happy to hang out there.

  • Decrease the distance you throw the treat.

  • Watch your dog’s body language to see if they’re able to take the treat from the new location while remaining relaxed. If so, repeat until they’re regularly approaching without signs of anxiety.

  • Continue to shorten the distance slowly until, eventually, you offer the treat from your hand.

  • If your dog darts in to grab the treat then darts away, you will know you are pushing them too fast.

Limit scary experiences on walks

To help a dog feel safe and confident in the world, they shouldn’t be placed in frightening situations. Remember that scary is relative. You may not think a rumbling truck or a busy street is scary, but your dog might.

To give your dog the best chance of building confidence outdoors, begin by walking them in the quietest place you can think of, preferably away from roads. Gradually over time (weeks or months, not days) shift your walks to busier and noisier locations. For example, your next location could be a quiet residential street.

Be sure to walk armed with plenty of high-value treats, which you can give your dog immediately after anything loud or unexpected happens. For example, if a skateboarder zooms by, immediately pull out a handful of treats and deliver them to your dog’s mouth one after another until your hand is empty. If your dog is uncomfortable taking treats from your hand, drop the handful on the ground beneath them.

Use games to build confidence

Bonding with a rescue dog that doesn’t trust the world requires confidence building. Games are a great way to start.

If your dog is uncomfortable being approached or eating food from your hand, try some extremely simple shaping exercises. Shaping is like a game of hot-and-cold where your dog is rewarded for moving closer to the goal.


How to play a shaping game

  • Decide what you want your dog to do. Stick to easy tasks like walking to the dog bed or touching a toy with their nose or paw.

  • Throw your dog a treat each time they look at the destination you’ve chosen for them.

  • Next, throw them a treat for shifting or inching closer to it. If your dog moves away, don’t reward.

  • Finally, when they accomplish the goal, jackpot them by throwing a handful of treats.

Practice your training exercises in short bursts of a few minutes at a time and make sure your dog is successful. If they’re struggling with a cue, they may not be ready for it. Be patient and always end on a win.

Help them make other dog friends

When you’re dealing with a dog with trust issues, it can be easy to forget that they’re still a dog. Many dogs that don’t trust humans are comfortable with their own kind.

Give your pup the opportunity to socialize with other dogs to help relieve stress and build their confidence in different environments. Busy enclosed dog parks aren’t always the best option for a fearful dog, as they can be noisy, chaotic, and overwhelming.


For best results, create opportunities where they can interact with one or two pets at a time, or where they have enough space to encounter other dogs without feeling pressured to interact, like a dog-friendly recreation area.


Hear From Us Again

Don't forget to subscribe to our email newsletter for more recipes, articles, and clinic updates delivered straight to your e-mail inbox.

Related Categories:

dog health, client care