Just Puppy Things: Tips to take the bite out of teething

0514 _ teething tips _BlogTh.png

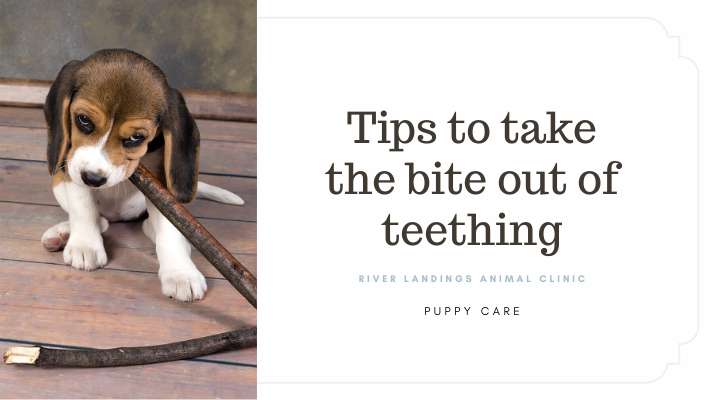
5 Ways to Help with Puppy Teething

Next to potty training, the puppy teething phase is one of the most challenging periods of puppyhood. A puppy’s drive to nibble, chew, and bite can lead to a household full of destruction and bruised body parts. The puppy teething phase is a normal developmental period that occurs as a puppy’s adult teeth begin to replace the needle-sharp deciduous teeth. Depending on your dog’s breed and size, this can start to happen at about four or five months of age. Keep in mind that puppy biting isn’t caused by teething alone! Puppies also communicate and explore the world with their mouths, and it’s up to you to help your new puppy select what is and is not okay to chew.

1. Puppy Proof Your Home

You should puppy proof your home in anticipation of your puppy’s increased need to chew. Pick up anything on the ground that could be a teething target. That includes obvious items like shoes, socks, and low garbage bins, as well as things that might not be as obvious at first glance, like rugs with fringe on the end, decorative baskets, magazine racks, and semi-hidden cords. The desperate-to-chew puppy might zero in table legs, chair/sofa legs, and cabinetry, so consider treating them with a bitter chew deterrent spray. If your puppy picks up an item that they aren't supposed to have, offer them a trade with one of their special toys or a treat.

2. Teach Your Puppy ‘Gentle Mouth’

Puppies quickly learn that they get a reaction when they bite, whether it’s from their littermates or from their human caregivers. It hurts! Teaching your new puppy the importance of a gentle mouth is an important lesson. When your puppy clamps down on your hand too hard, mark the painful infraction by saying “Ouch!” and pull your hand away. Withdraw your attention for a few moments, and then resume contact with your dog. If your puppy bites down too hard again, mark the bite by saying “ouch” again, but this time get up and walk away from your dog, leaving them alone. This is social isolation, a potent but gentle punishment. If your timing is good, your puppy will soon learn that biting too hard makes their favorite person leave.

3. Provide Appropriate Chewing Outlets

Puppies need to have a variety of appropriate chewing outlets. Although plush dog toys are cute, they don’t last long enough to provide the teething puppy the type of resistance their sore gums require. Hard rubber dog toys are ideal, particularly the kind that have spots for treat stuffing. Some toys have small holes that require the puppy to move the toy around to get the goodies out, while others have larger holes that encourage the puppy to hold on to the toy and gnaw and lick to get the treats.

4. Try Frozen Goodies

Frozen goodies can also help a teething puppy. You can fill your puppy’s hard rubber toys with peanut butter and freeze them, or invest in a teething toy that can be wet like a sponge and frozen. A low-cost alternative is to wet and freeze a washcloth, but make sure to take it away once it’s thawed so your dog doesn’t rip it apart. Finally, try giving your teething puppy a frozen carrot for a healthy way to relieve some of the pain.

5. Buy Quality Dog Food

Make sure to feed your puppy a balanced diet that supports controlled growth and dental health. Quality dog foods that contain a whole named protein, like chicken, and have a mix of vitamins and minerals, including calcium for strong bones and teeth, will help your puppy’s smile look good for a lifetime. Ask your veterinarian about what is best for your dog!

Remain Patient

Puppy teething is a rite of passage that all puppy parents must endure, but with the right equipment and attitude, it can be a lot less painful!


Hear From Us Again

Don't forget to subscribe to our email newsletter for more recipes, articles, and clinic updates delivered to your inbox (here). Or, you can keep up to date by liking and following our Facebook page (here).

Related: We have more information under our dog health category.

Doggy outings in an age of social distancing

0512 _ Doggy outings in an age of social distancing _BlogTh.png

Life and everyday routines have been turned upside-down due to coronavirus restrictions—even for our dogs. It's likely you and your pup are missing your old life together: road trips, volunteer visits, activities with friends, puppy playdates, or puppy day camp. But slow, scent-filled strolls in local parks can become a welcome stand-in. Under stay-at-home orders, walking our dogs are, for many, a refreshing distraction. When it comes to a change of scenery, it’s an indulgence for those on either end of the leash.

Here are 10 tips for keeping your dog & you safe and healthy during the pandemic and beyond. (It goes without saying: Always pick up after your pup. If you can’t safely toss it in a public trash can, discard it at home.)

Stay close to home. Avoid unnecessary travel by finding a park or trail near your home. Check park websites and social media for updates, and respect closures: gates, cones, barricades, or signs. Although on some days you may need to take a short drive to the park with your dog, keep in mind that parking may be prohibited in some areas.

Adjust your routine. Some of your pet's favorite spots could be closed or completely blocked to cars. Popular spots could be open but often too congested for social distancing. If a park looks too crowded, or there’s no legal parking, plan to visit another time.

Treat your dog like a family member. According to the Centers for Disease Control and Prevention, “There is no evidence that animals play a significant role in spreading the virus that causes covid-19.” While a small number of pets have been reported to be infected with the virus, mostly after contact with people, the risk of animals spreading covid-19 to people is considered low. Until more is known about the virus, however, the CDC recommends treating pets as you would any other family member: Don’t let them interact with people or animals outside the household or family members who are sick.

Keep your distance. On paths and trails, stay at least six feet from other people AND dogs. When walkers or runners approach, step off the path and allow them to pass. Even better, find a field where you and your dog won’t have to pass anyone. We discourage on-leash meetings — now or ever. It’s an unnatural way for dogs to greet each other, and the tension on the leash can contribute to bad manners. If a stranger asks about saying hello to your dog, this is an easy time to practice saying, “Not right now, thanks for asking,” without the stigma of being unfriendly. Not all dogs love other people or other dogs. Know your dog and what's comfortable for them. Even after we go back to not social distancing, we should be in the mind-set of giving dog space if they want it.

Read your dog. Pay attention to cues to know how your dog is feeling, especially when encountering another dog. Yawning, lip-licking, paw-raising, and tail-tucking can all be signs of anxiety. People tend to assume that a wagging tail means a happy pup, but it simply means arousal. A fast, upright wag means a canine concern. The friendly tail wag is lower, sometimes a full-body wag starting at the shoulder. Check out iSpeakDog for more guides to reading your pet’s body language.

Leash up. It’s always important to follow leash laws — for the protection of your dog, other dogs, and humans — but it’s particularly important now. The use of retractable leashes is controversial. Alexandra Dilley, director of behavior and training at the Humane Rescue Alliance (HRA), advises against the leashes because many people mishandle them. It takes coordination and practice to shorten the leash if you need to quickly control your dog. Dilley warns that retractable leashes can get entangled with other dog leashes, and if you grab the leash as a dog’s running it out, you may cut or burn your hand. When trainers do recommend retractable leashes, it’s only for remote areas or fields, where 20-foot traditional leashes are handy, too.

Train while you walk. Take this quieter time to work with your dog on behavior. If your dog gets triggered (by a person, dog, skateboard, loud truck, etc.), shorten the leash, try to put yourself between the dog and the trigger, and pass as quickly as possible. Do not make the dog sit and force them to remain in an uncomfortable situation. If you have to pick up the pace while distracting the dog with treats, I think that’s the better option.

Don’t leave home without treats. In an environment with lots of distractions, it’s important to keep your dog’s attention. The best way to do that is with treats. For example, when you step aside on a trail or pathway to let a dog pass, reward your dog for sitting and waiting. Treats, especially low-calorie and low-mess treats, are also a great way to reinforce good behavior. To engage dogs who aren’t as food-driven, bust out those higher-value treats.

Go for a short sniff. You may be counting your steps, but your dog doesn’t need to follow suit. Sniffing and other mentally enriching exercises (such as finding hidden treats around the house or working to get their kibble out of a toy) are at least as important as physical exercise. Replace that four-mile walk with a leisurely, one-mile sniff. Introducing your dog to new places — where different critters live and varied smells await — is like picking up a new book. Eighty percent of the walks should be sniffing. You’ll be surprised how tired that makes them! If it’s a bad weather day, maybe consider buying or making your own Snuffle Mat.

Leave your dog home daily. Dogs aren’t much for planning, but their human companions can do something now to prevent separation anxiety in the future. We recommend leaving your dog home alone several times a day. Go out and have your own experience to remind them we do have lives away from them, and we’ll be going back to work and school. If you normally take your dog for two or three walks a day, don’t start doing it more often, just because you have more time. Rather, get in your own power walk. Also important: Keep your routine. If your dog typically walks and eats before sunrise stick to the schedule so the post-pandemic change won’t be traumatic.

HRA recently offered a webinar with tips on how to teach your dog to “live well when alone.”

COVID-19: The Time is Now to Teach Your Dog to Live Well When Alone. Join the Humane Rescue Alliance and Tracy Krulik for information on how to prevent and t...

COVID-19 Response: River Landings Animal Clinic


Hear From Us Again

Don't forget to subscribe to our email newsletter for more recipes, articles, and clinic updates delivered to your inbox (here). Or, you can keep up to date by liking and following our Facebook page (here).

Related: We have more information under our cat health + dog health + client care categories.

Socialization of Cats and Dogs

0504 _ socializing _BlogTh.png

What is socialization?

Socialization is the process of preparing a dog or cat to enjoy interactions and be comfortable with other animals, people, places, and activities. Ideally, socialization should begin during the "sensitive period" which is between 3 and 14 weeks of age for puppies, and 3 and 9 weeks of age for kittens.

Advice to new puppy and kitten owners

Adopting a new kitten or puppy is a wonderful and exciting experience. It is also a time where a little extra planning can help a new pet develop a calm and confident temperament that will help them enjoy life to the fullest. The basic tenets of socialization are outlined below.

  • When adopting a puppy or kitten, ask for a pre- and post-adoption socialization plan.

  • Create a socialization plan specifically for your dog or cat to prepare him or her for life in your household. Plan exposures to the animals, individuals, environments, activities, and objects that will be part of his or her new life.

  • Provide regular positive and diverse experiences to encourage your dog or cat to enjoy new experiences without becoming fearful or aggressive.

  • Provide praise, play, and treats to reward engagement. Allow the dog or cat to withdraw if he or she is uncomfortable. Move at a pace appropriate for your pet's personality.

  • Well-managed puppy or kitten socialization classes are a good way to socialize your new pet within the “sensitive period” of a pet’s life.

  • Puppies or kittens that are not fully vaccinated should not be exposed to unvaccinated animals or places they may have been (such as outdoor parks).

  • Continue to reward your dog or cat for calm or playful responses to social interactions throughout his or her life.

  • For dogs or cats with special behavioral needs, develop a plan with your veterinarian and/or another animal behavior expert.


Hear From Us Again

Don't forget to subscribe to our email newsletter for more recipes, articles, and clinic updates delivered to your inbox (here). Or, you can keep up to date by liking and following our Facebook page (here).

Related: We have more information under our cat health + dog health + client care categories.

How to Remove Ticks on Dogs and Cats

0416 _ ticks _BlogTh.png

Ticks can transmit deadly diseases to a pet within as little as 24 hours of latching on, so swift removal is important for minimizing their exposure to disease.

While removing a tick may seem like a self-explanatory process, you’ve probably heard some myths about tick removal that can actually do more harm to your pet. Here’s the best way to remove a tick from a dog or cat safely.

What You’ll Need to Remove Ticks on Pets

Before you start the actual removal process, these are the supplies you should have on hand:

  • Tweezers (pointy ones work best)

  • Latex or rubber gloves

  • Rubbing alcohol

  • Antiseptic wipes (optional)

  • Jar or container with lid

  • Treats (for distraction)

How to Get a Tick Off Your Pet

Follow these steps to safely remove a tick from your dog or cat:

STEP 1: PUT ON YOUR GLOVES.

Ticks carry infectious agents that can affect both humans and dogs, so it’s always better to play it safe and wear protective gear.

STEP 2: STEADY YOUR PET AND KEEP THEM CALM.

When you’re getting ready to remove the tick, you’ve got to keep your pet calm. Any unusual poking or prodding tends to make dogs and cats nervous. If there is another person available, have that person help keep your dog relaxed during removal.

You may find it helpful to distract your pet with lickable dog treats. You may also use treats as rewards for cooperative behavior during the tick-removal process.

Never try to force your dog or cat to stay put. If your dog resists during the tick-removal process or becomes scared or aggressive, you should enlist the help of your veterinarian.

STEP 3: POSITION YOUR TWEEZERS.

Take a pair of tweezers—fine-tipped, pointy ones work best—and grasp onto the tick as close to your dog’s skin as possible. Grabbing close to the skin is the best way to get a tick head out.

Be careful not to pinch your dog’s skin.

STEP 4: PULL OUT THE TICK.

Using steady, even pressure, pull the tick straight out. This is the best way to remove a tick from a dog.

Do not twist or jerk the tick because you want to avoid leaving any part of the tick’s mouth or head behind. Also, make sure not to squeeze or crush the tick, since its fluids may contain infectious material.

Although you may have heard that you can remove a tick with a lit match, this is a dangerous myth! Doing so can cause a tick to release toxins or diseases into your pet.

After removing the tick, examine it to make sure the head and mouthparts were removed. If not, take your pet to a veterinarian to remove any remaining tick parts.

STEP 5: KILL THE TICK.

Kill the tick by placing it in a container with rubbing alcohol.

Once the tick is dead, most veterinarians recommend keeping it in the container with a lid in case your pet begins displaying symptoms of disease.

There are many types of ticks, and each tick carries different kinds of diseases, so keeping the tick can help your veterinarian make a proper diagnosis.

STEP 6: DISINFECT THE BITE SITE.

You can use triple-antibiotic spray or wipes to disinfect the bite site, or you can use over-the-counter chlorhexidine solution to clean the area.

Keep an eye on it for signs of infection. If the skin remains red or becomes inflamed, see your veterinarian right away.

STEP 7: PROTECT YOUR DOG.

Start your pet on effective flea and tick prevention to keep them safe. If you already have your pet on flea protection, read the label to make sure it also protects against ticks. If it doesn’t seem to be working, ask your vet for recommendations for an effective flea and tick treatment.

Make sure to keep a close eye on your dog or cat over the next few weeks. You should be on the lookout for any strange symptoms, including a reluctance to move (joint pain), fever, fatigue, loss of appetite, swollen lymph nodes or swelling at the tick bite site.

If your dog displays any of these symptoms, take your pet to your veterinarian immediately.


Hear From Us Again

Don't forget to subscribe to our email newsletter for more recipes, articles, and clinic updates delivered to your inbox (here). Or, you can keep up to date by liking and following our Facebook page (here).

Related: We have more information under our cat health + dog health + client care categories.

Why do dogs eat grass?

0402 _ why dogs eat grass _BlogTh.png

Why Does My Dog Eat Grass? And Should I Be Worried?

Is your canine companion chowing down on the lawn? You're not alone! Many dog owners are confused (and maybe a little worried) when they see their furry friend munching on grass.

Rest assured: Occasional grass-eating is normal dog behavior and usually isn't a cause for concern. But let's explore the reasons why dogs do it and when you might need to intervene.

Why Dogs Eat Grass:

  • Natural Behavior: Dogs, even wild ones, sometimes eat grass. It might be a leftover instinct from their ancestors.

  • Upset Stomach: Some believe dogs eat grass to induce vomiting and relieve tummy troubles. However, the evidence is mixed.

  • Fiber Needs: Grass is a good source of fiber, which aids digestion. If your dog's diet lacks fiber, they might seek it out in the lawn.

  • Nutritional Deficiencies: In rare cases, grass-eating could indicate a dietary imbalance.

  • Boredom or Curiosity: Puppies and young dogs might simply be exploring or trying to relieve boredom by nibbling on grass.

Signs to Watch For:

  • Vomiting After Eating Grass: While some dogs vomit after eating grass, it's not always the case. Frequent vomiting could indicate a more serious issue.

  • Loss of Appetite or Other Changes: If your dog's eating habits change significantly alongside grass-eating, consult your veterinarian.

  • Eating Harmful Plants: Make sure your dog isn't munching on toxic plants alongside the grass.

Should You Stop Your Dog From Eating Grass?

In most cases, no. Occasional grass-eating is harmless. However, you can address potential underlying causes:

  • Increase Exercise: If boredom is a culprit, provide more playtime and mental stimulation for your dog.

  • Adjust Diet: Talk to your vet about a high-fiber diet if you suspect a fiber deficiency.

  • Keep Your Lawn Safe: Ensure your lawn is free of toxic herbicides, pesticides, and plants.

When to See a Vet:

If your dog's grass-eating is accompanied by vomiting, lethargy, or other concerning behaviors, schedule a vet visit to rule out any underlying health issues.

ADDITIONAL RESOURCES