5 Tips for Caring for a Senior Dog

0616 _ caring for senior dogs _BlogTh.png

If your dog is going a little gray in the muzzle, they may be entering the senior stage of their life.

While the standard age range for senior dogs varies by breed and size, pet parents should watch for signs of aging and make necessary adjustments to provide their pets with the best senior dog care available.

How to Take Care of Senior Dogs

If you need to take care of a dog who is older, making subtle changes to your dog’s routine, veterinary care, and home environment can help them live a healthier and more comfortable life.

Tip 1: Keep Your Senior Dog Active

As dogs age, it’s important that they continue to get plenty of exercise. If they don't move it, they lose it. Muscle mass is the main driver of metabolism, and dogs that lose muscle mass develop frailty syndrome, which accelerates the aging process.

If a dog’s activity level gradually decreases over time, it could be a sign that something is wrong. Owners of old dogs should watch for subtle signs of pain and visit a veterinarian to come up with an ideal treatment plan. Pet parents still think that 'slowing down' is normal for old age. It isn't always the case—it is indicative of untreated pain.

Dog monitors that attach to a dog collar, such as the Whistle 3 dog GPS tracker and activity monitor, are useful tools that are designed to help pet parents keep tabs of their dog’s activity level. If activity levels are low, dog owners can adjust a pet’s exercise routine to include more playtime or longer walks.

Keeping your senior dog active will also help prevent weight gain. Keeping your dog thin is the most important thing you can do to help minimize the effects of arthritis.

Tip 2: Get Your Dog’s Blood Work Checked

As dogs get older, it’s a good idea to see your veterinarian on a regular basis for checkups. Besides an annual or biannual exam, it is suggested that pet parents get yearly blood work done for their senior dogs.

It's recommended that you do blood work to check your senior dog's white and red blood cells and their kidney and liver function to make sure that they're healthy. This is an easy way of being able to detect any kind of disease.

Tip 3: Invest in an Orthopedic or Heated Dog Bed

If you want to take care of a dog that is getting up there in age, splurging on an orthopedic dog bed or a heated dog bed may help senior dogs that are suffering from arthritis and other joint problems.

A pain-free, restful sleep is huge for older dogs. It can improve mobility, reduce pain, and improve quality of life.

A heated dog bed may help a senior dog with stiffness and joint problems. It has a built-in heater that warms up to your dog’s natural body temperature.

You can place a heated pad or mat into your dog’s bed for a similar effect. Consider electric warming pads that are thermostatically controlled and have emergency shut-offs if they overheat. Such a pad will provide substantial relief for the achiness of age-related arthritis.

In particular, the K&H Pet Products pet bed warmer is specifically designed not to exceed the natural body temperature of your dog. It fits inside most pet beds and is MET listed for safety. This means that it has been tested at a “Nationally Recognized Testing Laboratory” to ensure quality and safety standards.

Tip 4: Try Using a Dog Support Sling

If your senior dog has mobility problems, a dog support sling or a specially designed dog harness can be a big help. If your dog has a really hard time getting up, sometimes using a dog sling can help them get on their feet. There are great harnesses available that have a handle on the back so you can easily assist your dog. Dog support slings are designed to help make walking, climbing stairs, going to the bathroom, or getting into the car easier for your senior dog.

Tip 5: Make Small Changes to Your Dog’s Environment

If you have a senior dog, making small adjustments to your home and their environment can have a big impact.

Putting down more carpeting around your home so that your senior dog will have an easier time getting up and will be less likely to slip on hardwood or tile floors.

Dog socks with rubberized, non-slip soles can also help provide traction for senior dogs.

It is also recommended that senior dog parents consider using dog ramps throughout their homes. Ramps are a wonderful way to help dogs get into cars, up and down stairs and onto furniture.

Additionally, pet parents may need to reevaluate the dog food and water setup they have for their dog in order to provide extra comfort and ease of use. Pet parents should consider an elevated dog bowl for their dog’s food and water to eliminate excess strain on a dog’s head and neck.

Senior dog parents should make finding a water bowl easier for their aging pups. You may have to increase the number of water bowls around the home if the pet has trouble remembering where any single bowl may be located. A nightlight by the food and water can help, too.

Night vision is the first type to dissipate over time, so it can help your aging pet to put up nightlights throughout the home. You can also block stairways by using dog gates.


Hear From Us Again

Don't forget to subscribe to our email newsletter for more recipes, articles, and clinic updates delivered to your inbox (here). Or, you can keep up to date by liking and following our Facebook page (here).

Related: We have more information under our dog health category.

How much and how often should I feed my dog?

0611 _ How much and how often should I feed my dog _BlogTh.png

Do you feel guilty eating three yummy meals a day plus snacks while your dog just gets one or two scoops of dry kibble?

It doesn’t have to be that way.

There are several healthy ways to feed your dog, depending on its individual needs. Here are the top three:

1. Let Your Dog Decide

For dogs who are at a healthy weight and aren’t having accidents in the house, you may be able to use the free-choice feeding method.

This means you leave food out all day and let your dog graze. This can be a good method for highly active dogs that are burning more calories than their couch-potato friends.

If you are leaving food out all day for your dog to nibble on, use dry food, which won’t spoil.

If you have a nursing dog, she will probably be fed by the free-choice method. Dogs who are nursing need many calories to produce a constant flow of milk for their pups.

Downsides: Leaving dog food out all day could attract insects, rodents, or raccoons. That’s especially the case if you feed your dog outside, so be on the lookout.

And if you have more than one pet, they may bicker over the food. Also, this method is not for dogs that are diabetic.

2. Control Portions

For the dog who would never stop eating, use the portion control method. First, ask your vet what your dog’s ideal weight is. If you are using commercial dog food, feed your dog the amount printed on the bag that fits with your dog’s ideal weight. Sometimes, however, the suggested amount is more than your dog needs. Your veterinarian can calculate the exact amount to feed.

You can feed your dog one or two times a day. It’s best to do it twice daily at 8-12 hour intervals. If you’re doing it this way, split the suggested amount found on the bag or you’ll feed your pet double what they need.

3. Watch the Clock

If you’re not worried about your dog over-eating but don’t want to leave the food out all day, use the timed feeding method. This means you give the dog a certain amount of time, like 30 minutes, to eat. When time’s up, put away what your dog hasn't eaten.

When you offer food again 8-12 hours later, your dog will be hungry and ready to eat.

What about treats?

Dog treats should make up 5%–10% or less of your dog’s daily diet. Ask your vet about the number of treats this means for your dog. It’ll vary based on your dog's weight and activity level.

If you need to use treats frequently for training, use very small pieces. You can also set aside some of your dog's daily portion of kibbles to use as “treats” when you train.

My dog is in-shape but is always hungry.

Using the guidelines on a commercial pet food label should be a starting point for deciding how much to feed your dog. If your dog seems hungry all the time, you may need to feed them more. Beware that some dogs will always seem hungry and are already overweight. Speak with your veterinarian for the best food options to keep your pup feeling full for longer.

The amount of food your dog needs may change if:

  • Your dog becomes more active or is pregnant or nursing.

  • The weather is very hot or cold.

  • Your dog is recovering from surgery or an infection.

Before giving your dog more food, make sure they are not merely looking for attention and love. And if they are— serve that up instead.


Hear From Us Again

Don't forget to subscribe to our email newsletter for more recipes, articles, and clinic updates delivered to your inbox (here). Or, you can keep up to date by liking and following our Facebook page (here).

Related: We have more information under our dog health category.

What to expect after your pet's vaccination

It is common for pets to experience some or all of the following mild side effects after receiving a vaccine, usually starting within hours of the vaccination. If these side effects last for more than a day or two or cause your pet significant discomfort, it is important for you to contact your veterinarian:

  • Discomfort and local swelling at the vaccination site

  • Mild fever

  • Decreased appetite and activity

  • Sneezing, mild coughing, "snotty nose" or other respiratory signs may occur 2-5 days after your pet receives an intranasal vaccine

A small, firm swelling under the skin may develop at the site of a recent vaccination. It should start to disappear within a couple of weeks. If it persists more than three weeks or seems to be getting larger, you should contact your veterinarian.

Always inform your veterinarian if your pet has had prior reactions to any vaccine or medication. If in doubt, wait for 30-60 minutes following vaccination before taking your pet home.

More serious, but less common side effects, such as allergic reactions, may occur within minutes to hours after vaccination. These reactions can be life-threatening and are medical emergencies.

Seek veterinary care immediately if any of these signs develop:

  • Persistent vomiting or diarrhea

  • Itchy skin that may seem bumpy ("hives")

  • Swelling of the muzzle and around the face, neck, or eyes

  • Severe coughing or difficulty breathing

  • Collapse


Hear From Us Again

Don't forget to subscribe to our email newsletter for more recipes, articles, and clinic updates delivered to your inbox (here). Or, you can keep up to date by liking and following our Facebook page (here).

Related: We have more information under our cat health + dog health + client care categories.

Introducing a New Cat to Your Family Dog

0606 _ introducing-a-new-cat-to-your-family-dog-pet _BlogTh.png

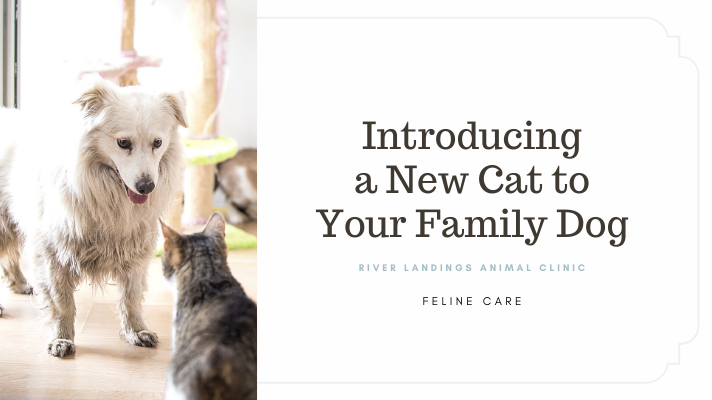
Whether you already have a dog and are considering getting a cat, or vice versa, it is very important to think about their first introduction. By letting a loose cat and an off-leash dog meet each other in an open room for the first time, you are probably setting up both animals to fail. Instead, plan ahead and take your time.

Matching cats & dogs

  • If you’re thinking of getting a cat for your dog or a dog for your cat, it’s important to consider both animals’ personalities. It may be helpful to look for a companion that has already been exposed to the other species in the past.

  • If a dog attempts to aggressively chase, pin, pick up or otherwise “manhandle” any cat, it is best to not even consider getting a cat — or at least to proceed with caution. Additionally, a dog who growls, lunges at or obsessively barks at a cat would probably do best in a cat-free environment. Likewise, a cat who growls, swats at, runs from or hides from dogs would probably prefer to not live with a dog.

  • If a dog loves chasing things, then a fearful, shy cat who runs away probably wouldn’t be the best choice, as it could trigger the dog to chase. Similarly, an energetic cat who runs and pounces would fall into this same category. A better match here would be a calm, confident cat who will not run (in fear or play).

  • If a dog plays roughly, it is best to avoid kittens or elderly cats who can easily be hurt. Instead, stick to playful adults who are interested in play, but are also confident enough to take care of themselves. If a cat is rambunctious or playful, a dog that is playful, but gentle, could be a great option.

  • If a dog or cat is elderly, laid back, quiet or anxious, then a calm counterpart would be best. Avoid rambunctious companions who may annoy, frighten or otherwise bother the other pet.

The introduction process

Regardless of whether you are getting a new cat or a new dog, the first introduction between your current pet and your new pet is a very important part of the process. Here are four steps that can help you ensure a successful meeting:

STEP 1: CHOOSE THE PROPER LOCATION FOR THE FIRST MEETING

  • Resident cat to new dog: If you are adopting a dog, you should not take your cat to meet them at a shelter, or another establishment which houses a number of animals for health and safety reasons. Instead, the introduction should take place at home.

  • Resident dog to new cat: If you are adopting a cat, do not take your dog into a shelter and expose them to the cats, as this can be highly stressful or traumatic for all of the cats. Also, it is not necessarily a good indicator of how the dog will react at home. Instead, ask the shelter’s adoption counselors whether they have any dog-savvy, confident cats they will allow to meet your dog under controlled conditions. If this is not possible, an alternative would be to have your dog meet a dog-savvy cat who belongs to a friend or relative. As a last resort, you can bring your new kitty home and do an introduction at home.

STEP 2: SEPARATE THE ANIMALS

  • Across a few days, rotate which animal has the freedom and which is confined to allow each animal plenty of time to investigate the other one’s scent.

  • Sometimes the dog should be confined to a crate or another room (or taken to another location if they can’t be left alone) to allow the cat time to roam free and investigate the smell of the dog.

  • If the dog obsessively digs at the separation barrier or barks at the cat for more than a day or two, the interaction likely won’t work without proper training. You may need the help of a professional.

  • When no one is home, the dog or cat must always be securely confined so unsupervised interactions are not possible.

  • Once the dog is calm (or at least not obsessed with the cat) and the cat is calm, eating and using the litter box normally, you can proceed to the next step.

STEP 3: MAKE LEASHED INTRODUCTIONS

  • Allow both animals to be in the same room at the same time, but keep the dog securely leashed.

  • Continue with this type of introduction until the dog is calm and ignores the cat, and the cat is calm, eating, and using the litter box normally.

  • If there is any fear or aggression displayed on either animal’s part, stay at step 2 longer.

  • Continue indefinitely until both the dog and cat seem happy and relaxed around each other.

  • When no one is home, the dog or cat should be securely confined to separate areas so unsupervised interactions are not possible.

STEP 4: ALLOW UNSUPERVISED INTERACTIONS

Unsupervised time together can occur after the cat and dog have been supervised around each other for a significant period of time (a month or so) and you are positive they will not hurt each other.

TRAINING TIP:

If the dog stares at the cat or the door separating the cat, try to distract the dog and get the dog to look away with treats, a happy voice, or by gently guiding the dog away on a leash. Once the dog is away from the cat, try offering a treat. If the dog takes it, repeat this process until the dog is no longer focused on the cat or door.


Hear From Us Again

Don't forget to subscribe to our email newsletter for more recipes, articles, and clinic updates delivered to your inbox (here). Or, you can keep up to date by liking and following our Facebook page (here).

Related: We have more information under our cat health category.

Introducing a New Cat to Your Family Cat

0604 _ introducing-a-new-cat-to-your-family-cat-pet _BlogTh.png

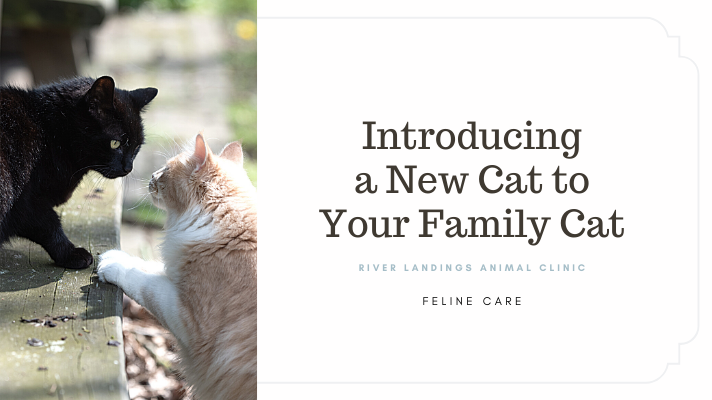
So you're considering adding a new feline friend to your home? Some people say cats are like chips — you can’t have just one! Whether your current cat is lonely, their companion cat recently passed away, or you simply love cats—it is important to take a few precautions to ensure that your cat-to-cat introductions go as smoothly as possible.

Finding a Cat

We always recommend adopting a cat from a local animal shelter. Millions of amazing cats enter animal shelters each year, and yet 71 percent are euthanized because there are simply not enough homes for them. A wide variety of cat breeds, sizes, colors, and personalities can be found at any animal shelter, which gives you a lot of options to choose from. Most shelters also have information about each cat’s personality and background, which increases your chances of success.

We recommend not purchasing from pet stores, as the cats there are no “better” than the homeless animals you’ll find at your local shelter, and they may have come from purebred parents who are kept in inappropriate conditions or not have been given the same amount of veterinary care as shelter cats.

If you are committed to finding a specific breed of cat, be sure to find a reputable breeder to deal with.

Adult or kitten?

If you have your heart set on a kitten, wait it out until “kitten season”, as shelters are often inundated with homeless kittens in the springtime. Keep in mind that in just a few short months that adorable kitten will look just like an adult. Meanwhile, adopting an adult cat, you will be able to assess more about their fundamental personality than you will be able to for a kitten, which could improve your chances of success.

Consider your current cat

Perhaps the most important step in adding another cat to your home is careful consideration of the resident cat’s personality. Features such as looks, size, breed, gender or any quality other than personality are not factors that should weigh heavily in the decision. Instead, focus primarily on personality matching:

  • If you have a very laid-back, elderly or frail kitty at home, it is best to avoid kittens and very playful or rambunctious cats.

  • If you have a rambunctious cat who zooms all over the house, getting a very laid-back or quiet, shy cat is probably not wise.

Try to focus on cats who have personalities similar to that of your current cat.

The introduction process

By planning ahead and taking things slowly, your chances of success when introducing cats are much greater. If you rush into things and attempt to “force” a relationship, you might inadvertently sabotage a relationship that could have otherwise worked out. Here are six steps that can help you ensure a successful introduction:

Step one: Start by trading scents

Once you have selected a potential new cat, ask the shelter or breeder if you can take home a blanket the cat has slept on to give to your resident kitty. Also prepare a blanket from home that your resident kitty has slept on, to give to your new cat. If you can exchange the cats’ scents with one another, you will be introducing a very important identification and communication signal right off the bat.

Step two: Prepare a separate room

  • Some cats can be dropped into the middle of a new home and adapt just fine, with everything working out between the kitties. However, such an approach can also end in disaster, injuries, or a failed adoption. Before bringing your new cat home, we recommend:

  • Find a quiet room in your house (a bedroom or bathroom) where you can keep the new cat safely separated from the resident cat for a few days.

  • Make sure it is a room where the resident cat has been, that it can be easily accessed by all human family members for social interactions and playtime, and that it is set up with food, water, litter, toys and soft beds.

  • Choose a room that has an inch or two of space under the door for feline introductions.

Step three: Feed them on opposite sides of the door

Place both cats’ dishes close to the door, on their respective sides. If one of the cats refuses to eat, you can feed them elsewhere, but still place dishes of tuna or some other tasty snack on either side of the door. By having both cats experience something positive (a meal or yummy snack) while they are nearby, they can learn to form positive associations with each other.

If either cat is growling or hissing at the other through the door, do not put them together anytime soon; take things very slowly and continue feeding this way. If the problems continue for several days, it is likely the match is not going to work out.

Step four: Exchange scents around the house

If both cats are eating well, and appear calm and relaxed on their respective sides of the door, then it’s time for the big scent exchange:

The resident cat should now be confined in the room, while the new cat is allowed to roam the house. Each cat should use the other cat’s (cleaned!) litter box, food and water dishes, beds and toys, so the only thing being exchanged is the cats themselves.

Continue to feed both cats close to their respective sides of the door.

While the new cat is exploring your home, you may want to close bedroom and bathroom doors at first so the new cat doesn't feel overwhelmed. Over the course of a few days, open a door or two at a time and increase the amount of space the new cat has access to.

If either cat appears stressed, nervous, or fearful, you might want to do the exchange described above multiple times, for example:

The new cat spends a few days in the room, then a few in the house, then back in the room — while the resident cat is in the opposite location. This can help ensure lots of scent exchange and desensitization.

Step five: Let them make visual contact

If everything seems to be going well, and everyone is acting, eating and using the litter box normally, you’re doing great! The next step is to open the separating door, but keep a gate of some sort across it so they can see, smell, and have contact with each other. The gate should prevent complete access. (A baby gate is perfect, but usually not high enough for cats, so you may need to stack two on top of each other.)

Continue feeding both cats on their respective sides of the door, and continue switching them back and forth.

Step six: Allow them to meet

If everything seems fine, and everyone is acting, eating and using the litter box normally, then it’s time to take down the gates.

There may be some hissing or swatting, but cats often will work things out by themselves. If there is a fight in which one of the cats is traumatized or injured (and you have followed all of the above steps), then the match will likely not work out.

If the cats seem to tolerate, ignore, enjoy, or interact with each other – that’s great news!

Leaving Cats Alone Together

It’s a good idea to separate the cats at first when you will not be around to supervise them. You want to ensure that you see all their interactions and know exactly what is going on. After you feel that the cats are getting along, you can ease up on this step.

Getting another cat will have a big impact on your resident cat, so consider your decision carefully, and introducing them properly is the right thing to do. Good luck!


Hear From Us Again

Don't forget to subscribe to our email newsletter for more recipes, articles, and clinic updates delivered to your inbox (here). Or, you can keep up to date by liking and following our Facebook page (here).

Related: We have more information under our cat health category.